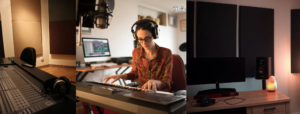
Setting up a home studio is not as difficult or expensive as you might think. From how to economically sound treat your room, to what affordable equipment you will need, we will be sharing with you how to get started.
What are you using your studio for?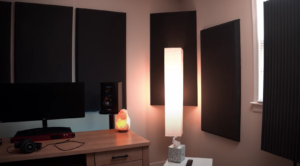
When designing a home studio, what you actually intend to do in the room is an important consideration. There are generally two options with very different goals. The first option is having a room as a recording space, the second option is to design the room as a listening space.
If you are recording in your room, your aim is for things to sound good when you record them in that space. This sounds pedantic but it’s true.
if you are listening in your room, you want the sound coming into your ears to be as accurate a match to the sound coming out of the speakers as possible. This is harder.
Sound waves in your room
First, we have to think about how sound behaves in a room. Direct sound, or dry sound, is the sound that goes straight into the mic or directly out of the speakers. But sound waves don’t just travel in a straight line, they go in all directions. Sound bouncing off various objects and surfaces in the room, and back into the microphone or your ears, is what is known as “reflections” or reverb.
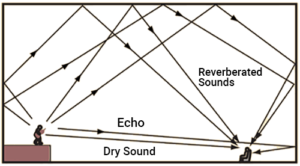 Essentially what we need to do when designing and “sound treating” our room is to add our own “various objects and surfaces” to absorb the sound waves and not let them reflect back.
When this is done professionally, there’s a lot of math involved … Sabins (which is the measurement of how well surfaces in a room absorb sound), standing waves, etc.
The actual math is generally not important for a DIY recording space, however. Simply understanding some general principles and techniques, and applying them, is all that’s needed for most situations. The difference in sound quality between a completely untreated room and a good DIY treated room, is greater than the difference in quality between that DIY treated room and a professionally designed studio.
Choosing your room
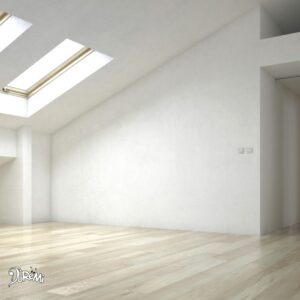
The first thing to look at when choosing a recording or listening space is the size and shape of the room. Bigger is generally better. A smaller space gives more opportunity for the sounds to bounce around quickly and often. Shape is also important, but more complicated. Symmetry causes standing waves which don’t sound good, but unplanned asymmetrically can make the sound bounce in unpleasant and unpredictable ways. Generally, if possible, you want a big and asymmetrical room with high ceilings. Preferably one with a hard floor and not a carpeted one.
Again, it’s good to bring up whether we are planning on listening or recording in this room. The goal for listening is to have the room “colour” the sound you hear as little as possible. Realistically, you aren’t going to have a lot of control over the size and angle of the walls in the space you will be using, so try to get the biggest, least square room you can, and don’t put your speakers in a corner.
If you are recording in the room, you want the colour of the room to sound good. It’s important to remember that people like how reverb sounds. A completely “dry” sound with no reverb is very unpleasant to our ears.
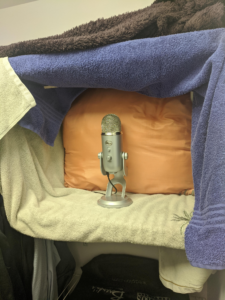 If you don’t have the ideal space, a close mic in a room that doesn’t overpower your sound source is all you really need. For example, a closet filled with blankets is a perfectly acceptable recording space for something like vocals. You can then add all of your “room sounds” later … there are countless plugins designed to make your recordings sound as if they were done in very expensive and famous rooms. Really, if you are recording a single track/instrument at a time, you can do a lot in a small padded space. It just gets harder to fit a full band or choir inside your closet.
Sound proofing vs. audio treatment
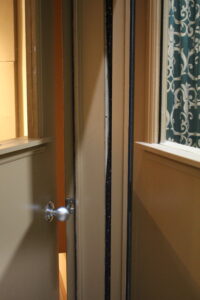 Sound proofing is stopping outside noises from coming into the room or recording. This can include anything from computer fan noises, to A/C, to traffic noise outside your bedroom window. Sound proofing is not technically “audio treatment”, because it isn’t dealing with the reverb in the room, but is still relevant.
Most sound proofing techniques are very difficult and expensive. They include “floating” your room to avoid vibrations by using double walls and floors to create an air gap which stops the sound. This is usually impractical and unnecessary for DIY needs.
For a home space you are just looking to eliminate the things you can actually control. These includes things like having your computer and gear in a separate room or space from your microphone so you don’t get fan noise. It includes turning off your A/C so you can sweat in silence. It is also within your power to stop the beat from bleeding out of your headphones into the mic.
Audio treatment, on the other hand, is dealing with and modifying the effect a room has on how something sounds inside of it. The most common way to do this is through sound absorption. For this, you use some sort of material that traps sound waves when they hit it, so that they don’t bounce back into the room.
There are two main parts of the frequency spectrum that you have to work with separately: the low end, and the mid to high frequencies. The low end is the hardest to deal with. but arguably the most important. There is nothing like thinking your mix is great and then immediately failing the car test because of the low end. For this, what you need are bass traps. 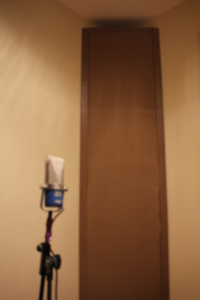
Low end frequencies are hard to absorb because the sound waves are so long. To combat this, bass traps are made of a variety of materials, like acoustic foam or rockwool, and with as much mass as possible. If you are planning on purchasing anything to help improve the sound quality of your space, bass traps should probably be the best investment.
The placement of these bass traps is also important. While the sky’s the limit for how many you can have, you should at least have them in the corners of your room, the place with the most and worst reflections. Assuming your space is a rectangle, this means four corners on the ceiling and four on the floor. While having all 8 covered would be ideal, you should aim for at least the four on the ceiling. Also important is the area directly behind where your speakers are.
Once the low end is dealt with in the best way possible, you are going to need acoustic panels to absorb the mid and high frequencies. Acoustic panels can be purchased, but are also quite easy to make. Assuming you have bass traps in the corners of your room, you are just going for coverage with the acoustic panels. An easy way to test whether you have enough and in the right spots, is to stand in the middle of your room and clap. If you hear a ringing echo, you need more acoustic panels.
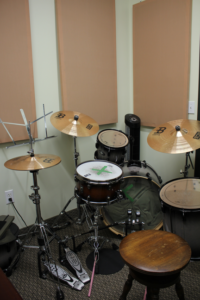
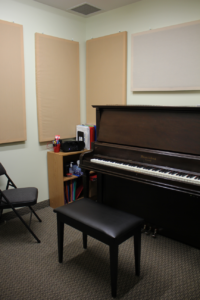 You will be surprised at how the drastically the sound in a room will change with some bass traps and a few DIY sound absorption panels. While at DRM, our studio is a fancy floating room with mathematically-placed professional acoustic panels, we have homemade ones in each of our teaching rooms. It makes a world of difference in a small space with a loud piano or a set of drums.
So, with bass traps in all of your corners, and acoustic panels on all of your walls, you should be ready to go. Stay tuned for the next instalments in our DIY Home Studio series, where we will share with you how to build sound absorption panels, we will go over what equipment you need, and we will be providing tips to help you start recording in your newly set up space.
