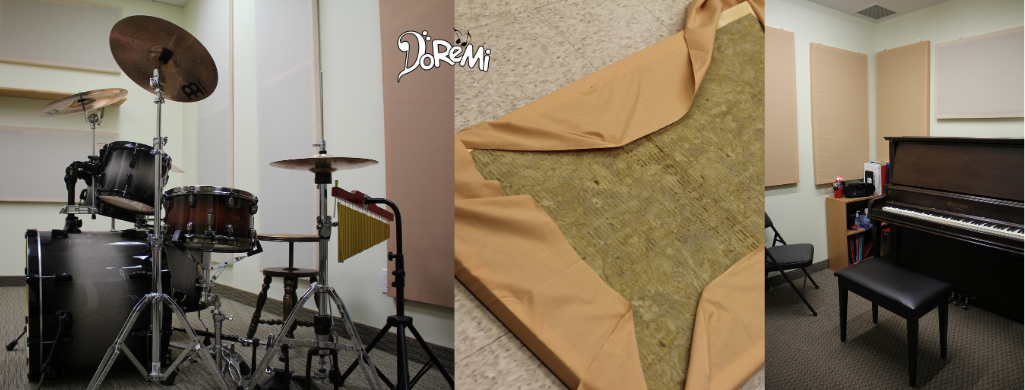
Whether you want to set up your own home studio, or you just want to dampen the sound from the practice room, sound absorption panels are a must.
When we first built the school, sound transfer from one room to another was a big problem, but the cost of purchasing panels to sound treat the rooms was way beyond our budget.
When we built the recording studio, however, the designer showed us how to construct our own acoustic panels. Now we can treat an entire room for about the cost of purchasing one panel, and we would like to share this process with you!
What you need
All the materials you need are easily found at your local build it store. We got ours at Home Depot, with a quick stop at the neighbouring sewing shop. The panels can be build using basic hand tools. 
For the frame you will need:
- two 2×2 boards per panel
- 8 screws, size 8 x 1 ¾
- wood glue
- a mitre box and saw
- a drill
- a screw driver
For the insulation we used:
- Roxul Comfortboard 80, which comes in a pack of 6
For the covering, we used:
- basic broadcloth available at any sewing centre: 1. 6m of 113cm width
- a staple gun
Step One: the frame
 The inside of the frame needs to fit snugly around the Roxul sheet. The inside measurement should be the same as the measurement of the sheet. We worked better with outside measurements, so the short pieces were 67.3 cm and the long pieces were 128.6 cm. We cut the pieces at a 45º angle using a mitre box and mitre saw.
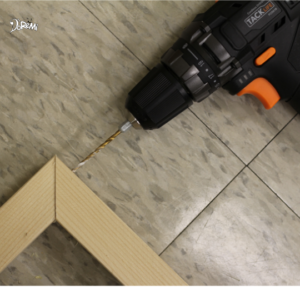
To assemble the frame, pre-drill the holes so that the screws don’t split the wood.
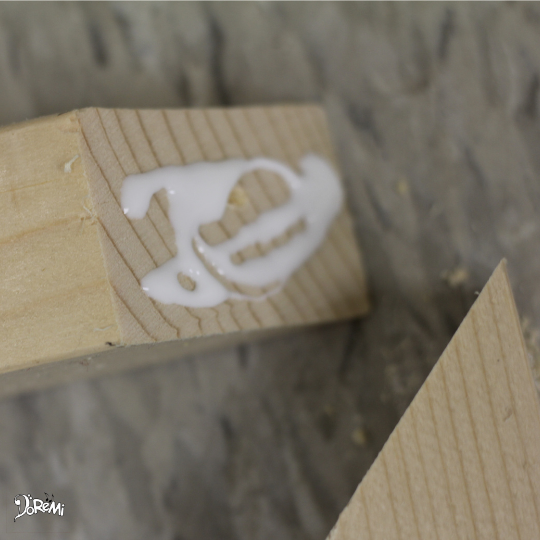
Put some glue in the joint to add stability.
Make sure you put screws in both directions.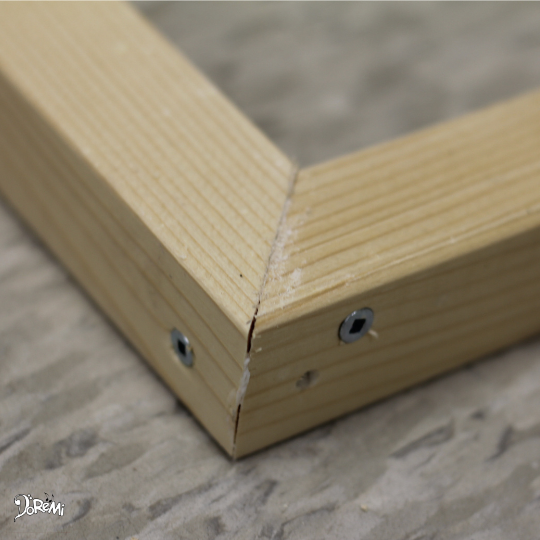
Don’t worry if it isn’t a perfect seam … you will be covering it up later!
Step Two: the insulation
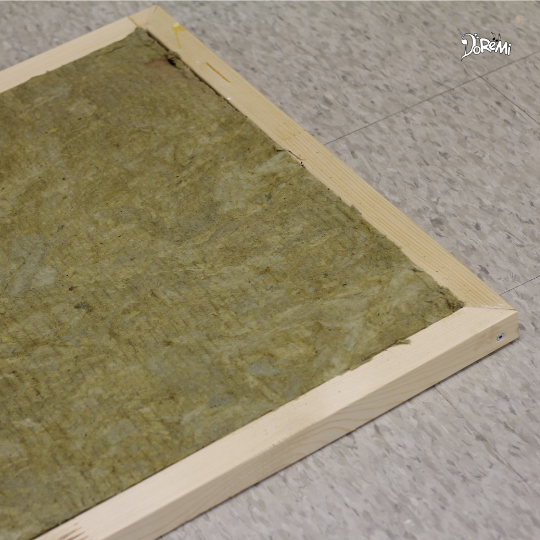
Your Roxul panel should fit tightly into the frame. If necessary, you can trim it with a carpet knife. Remember to wear gloves when handling the insulation.
Step Three: the covering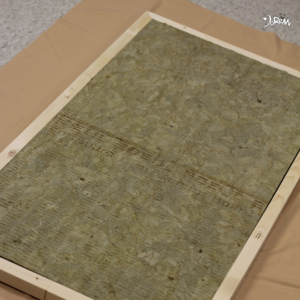

Make sure to iron out any wrinkles in your material. Centre the panel on the cloth.
You will want to use basic upholstering technique to ensure that the material is tight in all directions.
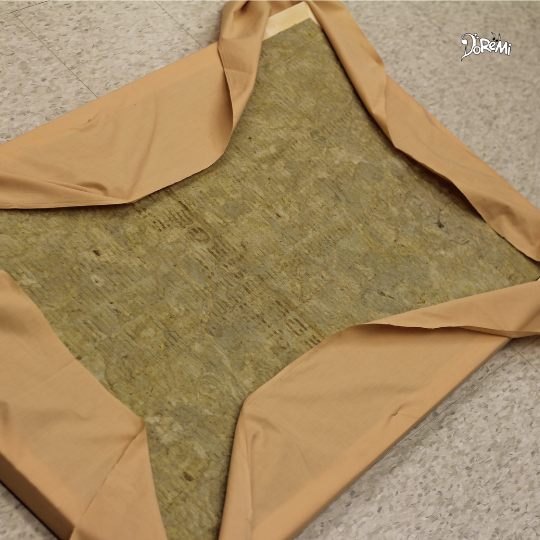 Start by affixing the centre of each side, don’t go around in a circle, do the centre of the long sides and then the centre of the short sides, making sure to pull the fabric as tight as possible.
Work outward towards the corners, making sure to keep the material tight and straight.
Tidy the ends using hospital corners.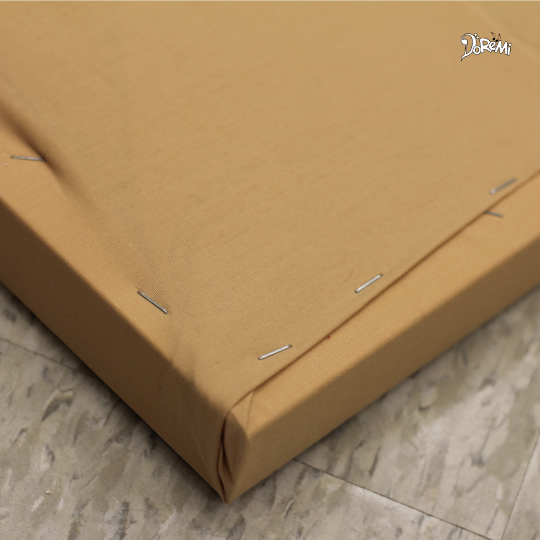
Step Four: attaching to the wall

There are a lot of different options. If you don’t want the hooks to show, you could use picture frame wire. We found the easiest was simply hooks and eyes.
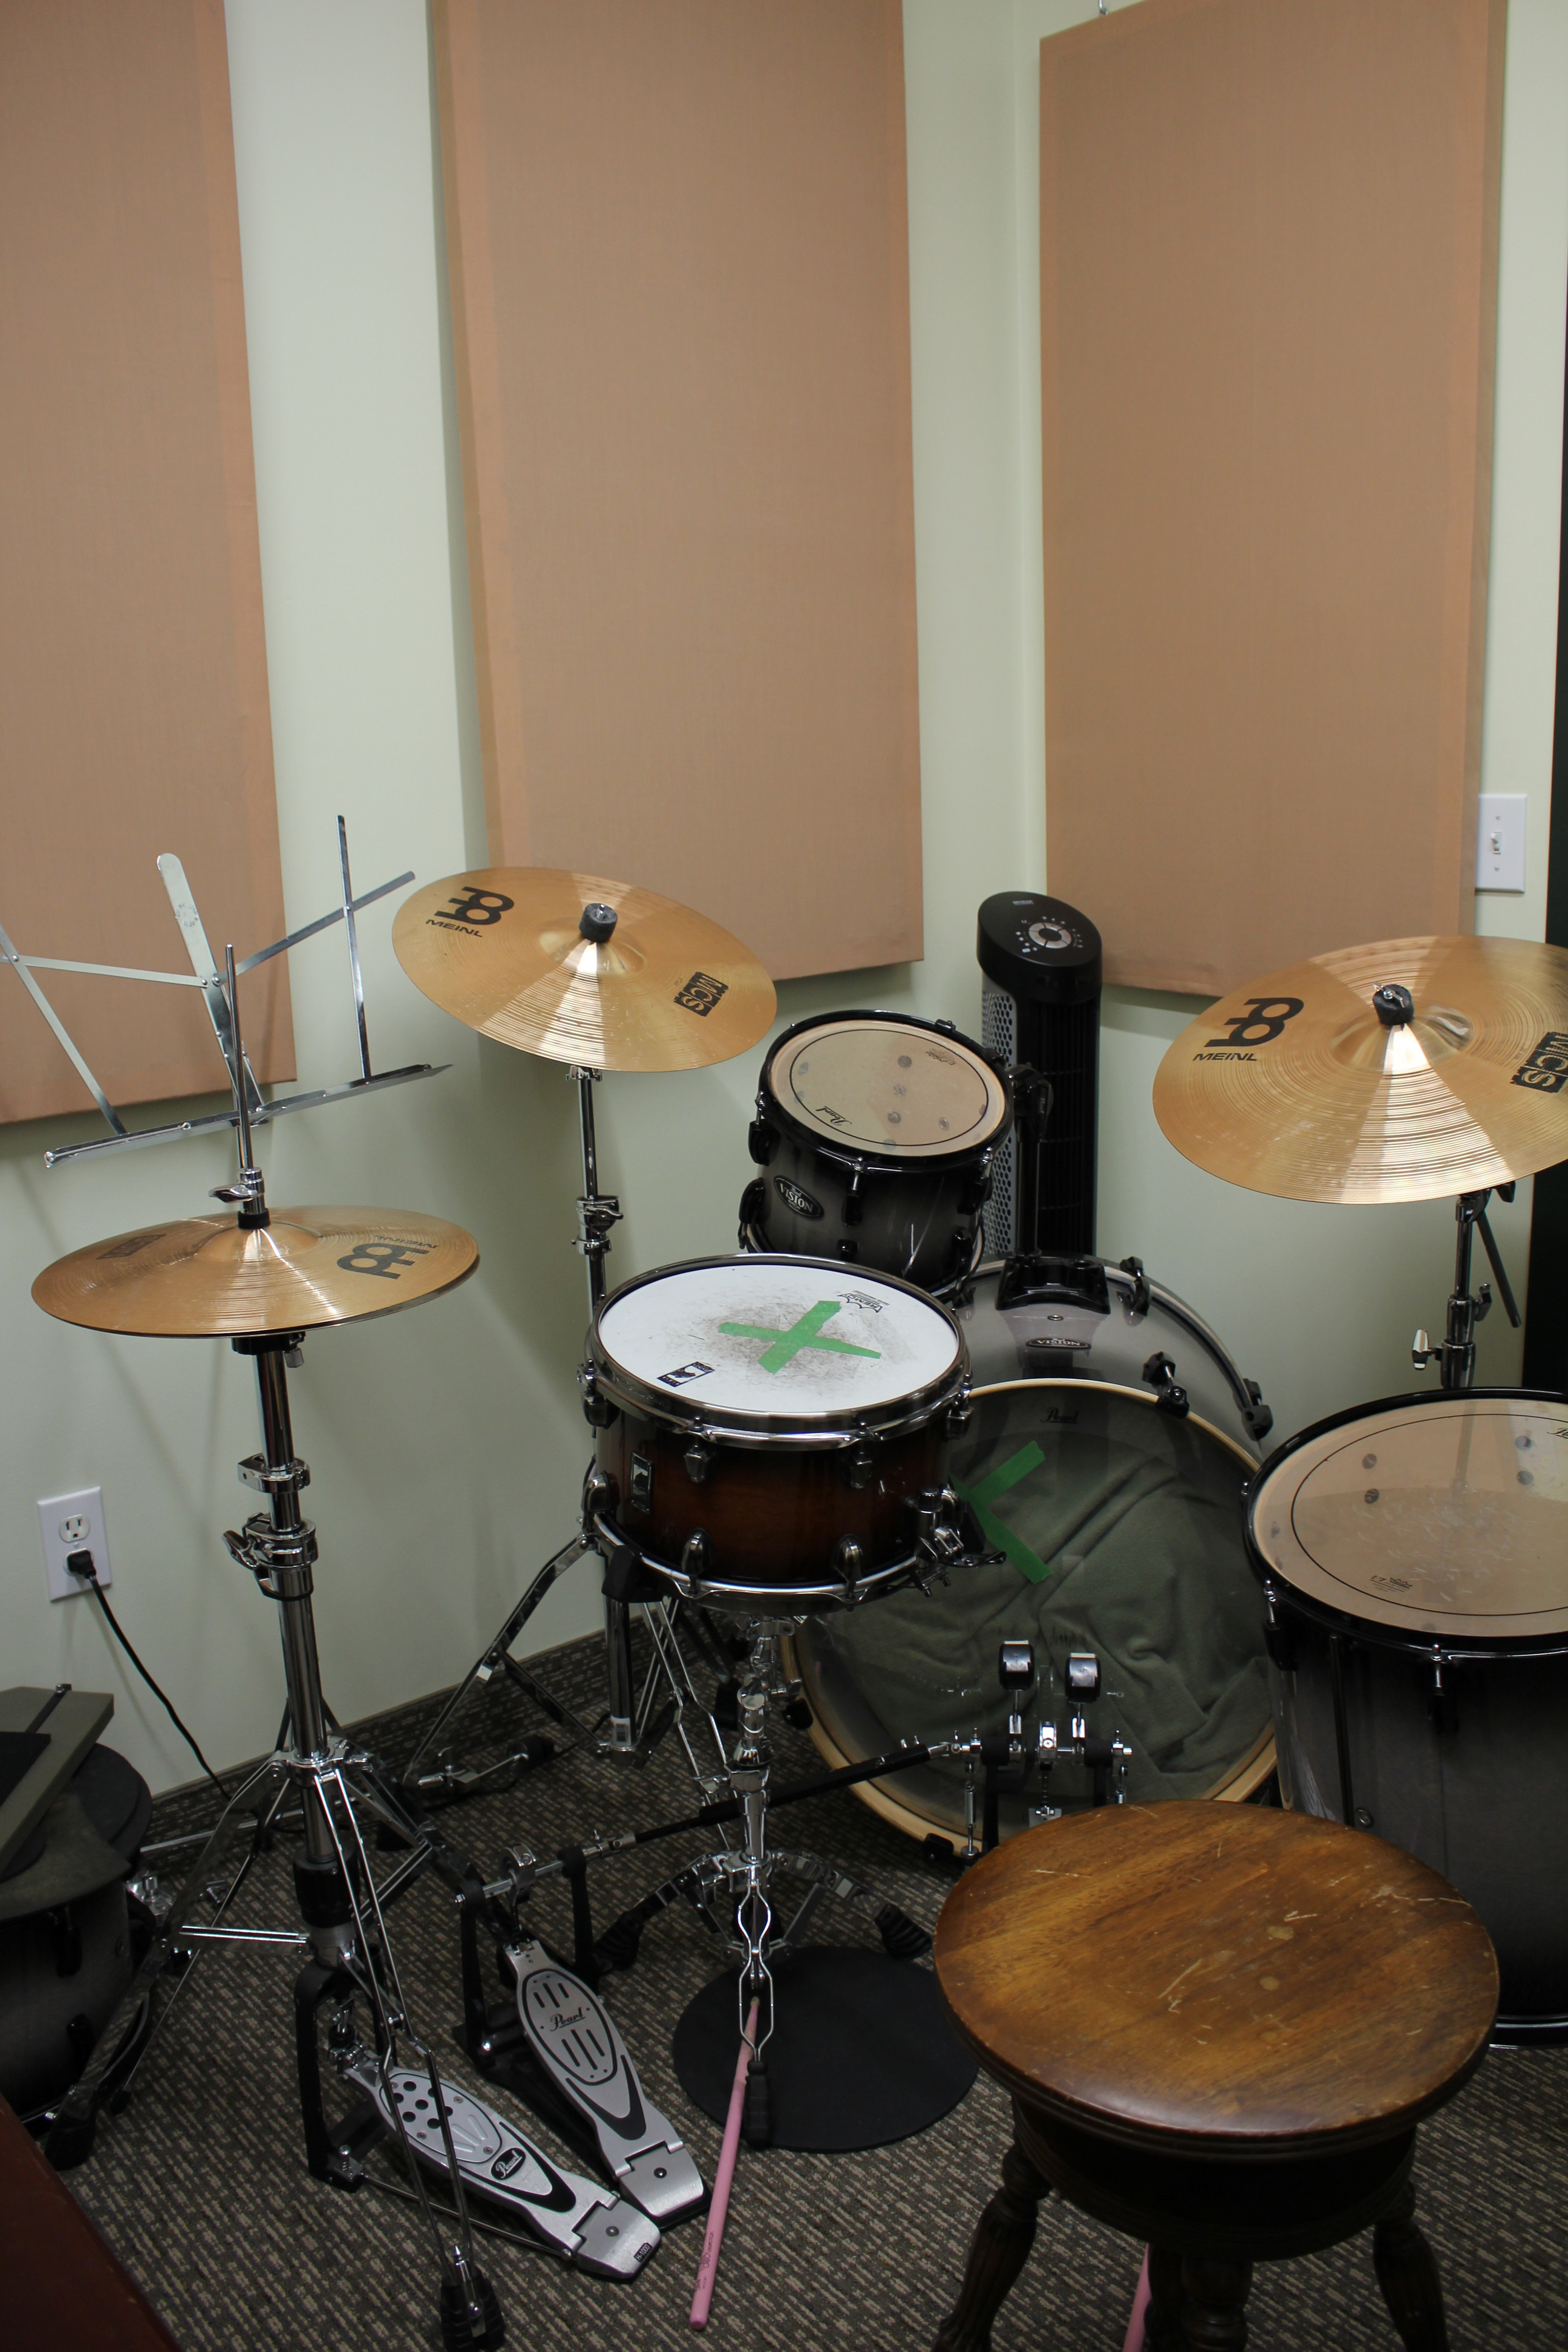
Once you have treated your room with acoustic panels, you will be amazed at the difference in sound. Good luck, and let us know how your panels turned out!